Why Your White Coffee Mug Mock Up on Wood Isn't Working and How to Fix It
You found the perfect white coffee mug mock up on wood. The scene looks warm, the lighting feels natural, and you can already picture your design wrapped around that crisp, clean surface. You download the file, open the PSD, and within minutes you expect to have a stunning presentation ready for your shop or social feed. But something goes wrong. The colors look off. Your text doesn’t sit right. The smart object layer behaves in ways you didn’t anticipate. You end up frustrated, and the mockup sits unused.
If any of this sounds familiar, you aren’t alone. The white coffee mug mock up on wood is one of the most versatile and popular presentation tools for creators, small business owners, and marketers. Yet because it appears so simple, many people skip the crucial steps that separate a professional-looking result from one that feels amateur. This article walks through common mistakes, overlooked details, and practical corrections so you can get the most out of this digital mockup every time.
What Makes This Mockup Different from Others
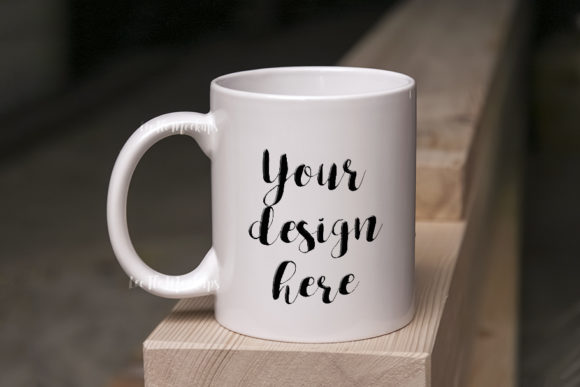
Before diving into what can go wrong, it helps to understand what you’re actually working with. The white coffee mug mock up on wood is built around a real photograph. The cup and the wooden background are captured together in one scene. That means you cannot move the mug, adjust its angle, or shift the background separately. The entire image is fixed except for the area inside the smart object layer where your design or text goes.
The file includes a single smart object layer set to multiply blend mode. This is a deliberate choice. Multiply mode allows the shadows, highlights, and texture of the original mug surface to show through your design, creating a realistic look that feels printed on the ceramic. However, the same feature can produce unexpected results if you aren’t familiar with how multiply works with different colors and image types.
The download provides one high-resolution JPG at 3504 x 2336 pixels (300 dpi, RGB) alongside a layered PSD file compatible with Photoshop CS4 or newer, as well as PIXLR online editor. You also receive a help file with instructions. These details matter more than most people realize.
1. Ignoring the Blend Mode and Layer Setup
The most frequent misunderstanding involves the multiply blend mode on the smart object layer. Many users assume that whatever they place inside the smart object will appear exactly as it looks in their design software. In reality, multiply darkens the underlying layers where your design has color, while pure white becomes transparent. This means if your design uses light pastels, thin line art, or white backgrounds, the results may look faint, muddy, or entirely invisible against the mug’s natural shading.
How to fix it: Before you drop your artwork into the smart object, consider the contrast. Darker, bolder colors tend to show up well. If you must use lighter tones, try duplicating the layer or adjusting opacity after placing the design. Avoid using pure white elements unless you want them to vanish against the mug’s highlights. A good test is to preview your design against a gray background first to see how it behaves with multiply.
2. Overlooking the Instruction File
The download includes a help file with easy instructions, but many people skip it. The file explains that layers in the PSD are hidden by default, and that the cup and background are on the same layer. Without reading this, you might spend time trying to select or move parts of the image that simply cannot be separated. This leads to frustration, wasted effort, and the false impression that the mockup is broken or low quality.
How to fix it: Always open the help file first. It takes less than two minutes to read and saves you from rediscovering limitations that are clearly documented. Treat the instructions as part of the product, not optional reading. Understanding the structure before you start editing prevents unnecessary mistakes.
3. Using Low-Resolution or Poorly Prepared Artwork
The mockup delivers a 300 dpi JPG at 3504 x 2336 pixels. That’s a lot of detail. If you place a low-resolution image or a design with jagged edges into the smart object, the mismatch becomes painfully obvious. The mug’s sharp photographic background will emphasize every pixel flaw in your design, making the final presentation look unprofessional.
How to fix it: Prepare your artwork at the same resolution as the mockup. If your original design is small, scale it up inside the smart object using the nearest-neighbor interpolation method only as a last resort. Whenever possible, start with vector assets or high-res raster files. For text-based designs, keep the type crisp by using clean fonts and appropriate kerning. Remember, the mockup is only as good as the asset you place inside it.
4. Forgetting That the Background and Mug Are One Layer
Because the scene is a real photo, you cannot reposition the mug or swap out the background. Some users open the file expecting a layered composition where the mug can be moved to a different surface or rotated. When they discover the layers are merged, they assume the product is limited or inflexible.
How to fix it: Accept the fixed composition as a feature, not a flaw. The single-layer background ensures that lighting, shadows, and reflections are perfectly natural. If you need full control over positioning, this particular mockup is not the right choice. Instead, look for a multi-layer template that separates the mug from the background. But if you want a realistic, ready-to-use scene, this file delivers exactly that. Plan your composition around the existing layout rather than fighting it.
What to Check Before You Buy or Use This Mockup
Whether you are purchasing this file for the first time or revisiting it after an earlier attempt, a few checks can save you time and disappointment.
- Confirm your software compatibility. The PSD file works with Photoshop CS4 and newer, as well as the free online editor PIXLR. If you use an older version of Photoshop or a different application entirely, the smart object layer may not behave as intended.
- Understand the color space. The mockup uses RGB. If you intend to print your final design, keep in mind that what you see on screen may look different on paper due to CMYK conversion. This mockup is best suited for digital presentations—social media, blogs, web design, and shop listings.
- Review the included file format. You receive one JPG and one PSD. The JPG is useful for quick previews or direct posting if you don’t need to edit. The PSD is where you place your design. Make sure you have the PSD ready before you start.
- Check for watermarks or text. The downloaded files are clean. No watermark, no placeholder artwork, no sample text. That means the blank mockup is yours to use without extra cleanup steps.
How to Get the Best Results Every Time
Avoiding mistakes is one thing. Actively optimizing your workflow is another. Here are practical steps that turn a good mockup into a great presentation.
Start with a Clear Preview
Open the smart object layer and look at the existing content. In some versions, the smart object may contain a placeholder image. Replace it entirely with your own design. Do not edit the placeholder layer styles unless you understand how the multiply mode interacts with your design. If you are unsure, stick to replacing the content only.
Adjust Brightness and Contrast After Placing Your Design
Because multiply darkens your design, you may need to slightly increase brightness or contrast inside the smart object before closing it. This compensates for the multi-layered darkening effect and brings back detail that might otherwise get lost. A boost of 10–15% in brightness is often enough.
Use the JPG as a Reference
The high-res JPG included in the download shows the exact scene without any design. Open it alongside your PSD file to compare how the mug and background appear before and after your edits. This helps you spot any color shifts or artifacts introduced by your workflow.
Plan for the Multiply Mode
If your design includes semi-transparent areas, gradients, or soft edges, test them early. Multiply mode is excellent for simulating natural print effects, but it can also amplify unwanted transparency. For best results, keep your design fully opaque inside the smart object and use the mockup’s built-in shading to add depth.
Save and Preview at 100%
After closing the smart object, zoom to 100% view. This is the only way to see how the final image will appear to viewers. At lower zoom levels, small pixel issues can hide. At 100%, you will notice if your text has aliasing problems or if edges look soft where they should be sharp.
When This Mockup Shines and When to Look Elsewhere
The white coffee mug mock up on wood works beautifully for certain uses. It is ideal for social media posts that need a warm, grounded feel. Blog headers, Instagram squares, Pinterest pins, and product listing images all benefit from this natural aesthetic. The wood texture adds an organic element that complements quotes, vintage illustrations, minimalist text, and hand-drawn art.
However, if you need to present a mug from multiple angles, show the inside of the cup, or place the mug on a colored background, this single-scene mockup will not be sufficient. In those cases, you would be better served by a 360-degree mockup or a scene with separated layers. Knowing the difference saves you from forcing a tool to do something it wasn’t designed for.
Final Practical Advice
This mockup is a digital product, which means your success depends almost entirely on how you prepare and place your design. The high resolution, the realistic wood backdrop, and the multiply smart object are all there to help you. But they only work well if you understand them.
Read the instructions before you open the file. Check your software version. Test your design inside the smart object with brightness and contrast in mind. And if something looks off, step back and review the blend mode rather than assuming the mockup is faulty. These small habits separate a presentation that looks generic from one that looks intentional and polished.
Whether you are a freelancer preparing client proofs, a small business owner refreshing your Etsy listings, or a blogger adding visual appeal to your posts, the white coffee mug mock up on wood can become a reliable tool in your workflow. Use it with awareness, and you will consistently produce results that feel both professional and natural.