Square Pillow Cushion Mock Up: A Practical Tool for Visual Content Workflows
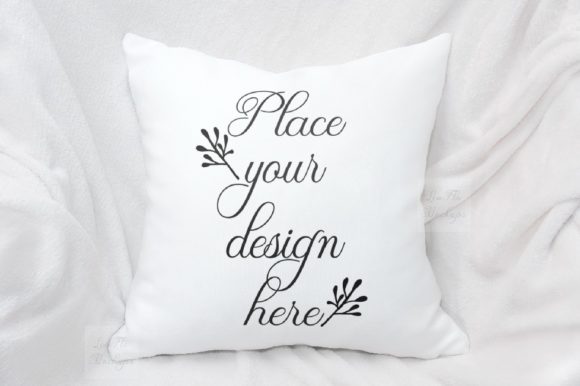
Creating polished visual presentations for social media, product listings, or portfolio pieces often requires presenting designs in realistic settings. A square pillow cushion mock up serves this purpose directly: it is a layered digital file that allows you to place your artwork, text, or illustration onto a high-resolution image of a neutral white pillow, producing a finished look without needing a physical photoshoot. This article examines how this tool fits into real creative and business workflows, how to use it effectively, and what to consider when integrating it into your regular production process.
What the Square Pillow Cushion Mock Up Actually Provides
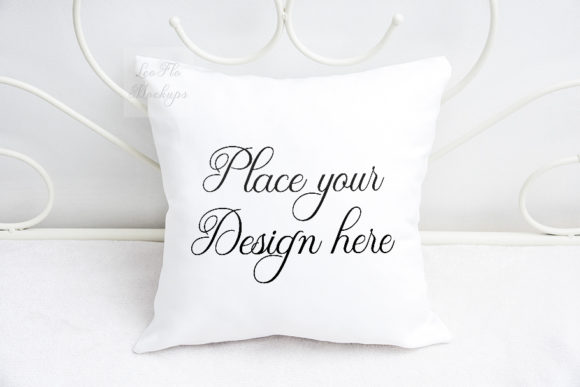
The digital file package includes three core components: a high-resolution JPG at 300 dpi (3504 x 2336 pixels, RGB), a PNG file with a transparent background layer for the empty pillow, and a Smart Object PSD file designed for Photoshop CS4 and above or PIXLR online editor. An instruction help file is also included. These files are delivered as a digital product without watermarks or placeholder artwork, so the pillow surface is clean and ready for your content.
The key distinction here is the transparent-background PNG and the Smart Object PSD. Both allow you to place your image behind the pillow shape, so the mock up looks like a photograph of a real pillow printed with your design. This eliminates the need for manual masking, perspective adjustments, or lighting matching. The file does the structural work; you provide the creative content.
Where This Mock Up Fits in a Broader Process
Mock ups are not standalone products. They are supportive assets that fit into a larger content creation, marketing, or design workflow. The square pillow cushion mock up is most useful during the presentation and validation phase of a project, but it can also serve earlier or later stages depending on your goals.
Before the Project: Planning and Client Communication
If you are a designer or freelancer pitching a concept to a client, showing a design on a physical object helps the client understand scale, placement, and visual impact. Instead of describing how a pattern might look on a textile, you can show a realistic mock up in the proposal stage. This can reduce back-and-forth revisions and clarify expectations early. The neutral white pillow also keeps the focus on your artwork rather than the prop itself, which is useful when you want the design to speak for itself.
During the Project: Testing and Iteration
Once a design is in progress, the mock up allows you to test variations quickly. Drop a few color versions or layout alternatives into the Smart Object layer, toggle between them, and compare how each reads on a physical object. This is especially useful for textile patterns, wedding monograms, vintage illustrations, or typography-heavy compositions where legibility and balance matter. Because the PSD uses a Smart Object, you can nondestructively replace the design as many times as needed without rebuilding the mock up.
After the Project: Portfolio and Social Media Presentation
After completing a design, you need to show it to the world. A plain screen capture of a digital file often lacks context and emotional appeal. Placing that same design into the pillow mock up creates a lifestyle-style image suitable for Instagram, a blog post, an Etsy listing, or a web design presentation. The high resolution also means you can crop into details or use the image across different aspect ratios without quality loss. For educators and bloggers, this approach turns a flat concept into a shareable visual that audiences engage with more readily.
Practical Implementation Tips
Getting the most out of this mock up requires some basic preparation and an understanding of how the files interact with your existing tools.
Preparation: What You Need Before Opening the Files
First, ensure you have access to software that supports PSD files with Smart Objects. Photoshop CS4 or later is the primary option, but PIXLR online editor also works if you prefer a free, browser-based tool. The instruction file is worth reading before opening the PSD because layers may be hidden by default. Knowing which layer to edit saves time and avoids confusion.
Second, prepare your design at a resolution that matches or exceeds the mock up dimensions. The pillow area in the PSD expects a reasonably high-resolution image placed behind it. If your design is too small or pixelated, the final output will look soft. A square or near-square design around 2000 to 3000 pixels on the longest side works well.
Third, consider the color profile. The files are in RGB, which is standard for digital display. If your design was created in CMYK for print, convert it to RGB before placing it into the mock up to avoid unexpected color shifts.
Usability: How to Place Your Design
For the PSD file, the workflow is straightforward: open the file in Photoshop or PIXLR, locate the Smart Object layer (it is usually labeled clearly or indicated in the instructions), double-click its thumbnail to open a new window, paste or place your artwork, save that window, and return to the main mock up. The design automatically maps into the pillow shape with the correct perspective and lighting. For the PNG file with the transparent background, open your design in any image editor, place the PNG layer on top, resize and position as needed, then flatten or export as a combined image.
The transparent-background PNG is particularly useful if you do not use Photoshop regularly. You can use free tools like GIMP, Canva (with some layering steps), or even PowerPoint to composite the pillow image over your design. This makes the mock up accessible to a wider range of users, including small business owners and hobbyists who may not have advanced design software.
Organization and File Management
Because this is a digital product, storing and naming the files systematically helps when you reuse them across multiple projects. Keep the original PSD and PNG files in a dedicated folder. When you create a new mock up for a specific project, save a copy with the project name in the filename. This prevents accidental overwrites and makes it easy to return to a previous version if needed.
If you use the mock up regularly, consider creating a template workflow. For example, keep a master PSD with placeholder artwork, then duplicate that file for each new design. This preserves the original structure and reduces the risk of breaking the Smart Object link.
How the Mock Up Interacts with Other Tools and Methods
A mock up of this kind is rarely used in isolation. It integrates with several common tools and platforms.
Social Media Scheduling and Posting
After exporting the finished mock up image, you can upload it directly to Instagram, Pinterest, Facebook, or LinkedIn. The square format of the pillow itself often fits naturally into Instagram’s square post format, but you can also crop the image to a landscape or portrait orientation as needed. For bloggers, the mock up image can serve as a featured image for an article or as an inline visual within a tutorial or product review.
E-Commerce and Shop Listings
Sellers on platforms like Etsy, Shopify, or Creative Market can use the mock up to show how a digital pattern or design looks when printed. Instead of uploading a flat digital file as the main product image, you present a realistic mock up that helps buyers visualize the final product. This can improve conversion rates because the image reduces uncertainty about how the design will appear on an actual object.
Portfolio and Web Design
For web designers and artists, the mock up image can be embedded directly into a Behance portfolio, a personal website, or a PDF case study. The neutral white background of the pillow means the mock up integrates cleanly into most page layouts without clashing with other colors or design elements.
Collaboration with Clients or Team Members
If you work with a team, the mock up file can be shared via cloud storage or email. The PSD file allows others to replace the Smart Object content without altering the underlying mock up structure. This makes it possible to hand off the file to a client or a colleague who can then drop in their own design without needing to understand the entire file setup.
Observations on Quality and Consistency
Not all mock ups deliver the same level of realism. The value of this particular file lies in the high resolution (300 dpi at 3504 x 2336 pixels) and the transparent-background PNG option. The resolution ensures that even close-up crops retain detail, which matters if you plan to use the image in larger format displays or print materials. The neutral white pillow is a deliberate choice: it reduces the risk of color casting on your design and keeps the focus on your artwork.
For long-term use, the PSD file is the most durable option because the Smart Object workflow allows you to replace the design as many times as needed without degrading the underlying structure. The PNG file is a one-time composite but is useful if you need a quick result without software dependencies.
One practical consideration: because the files are high resolution, they occupy more storage space than typical social media graphics. Plan accordingly if you are working on a device with limited disk space or if you are saving many versions of the same mock up.
Integrating the Mock Up into Your Regular Routine
If you produce visual content on a recurring basis, building a mock-up step into your workflow can save time and improve output quality. Here is a simple sequence that fits into a typical design or marketing workflow.
- Finalize your artwork in your primary design tool (Illustrator, Canva, Procreate, etc.).
- Open the square pillow cushion mock up PSD in Photoshop or PIXLR.
- Follow the Smart Object workflow to place your artwork.
- Adjust the positioning if needed—some designs may look better centered, while others benefit from an offset placement that mimics a real print.
- Save and export the combined image as a JPG or PNG for your target platform.
- Name the file with a descriptive title that includes the project name and resolution, so you can find it later.
- Add the mock up image to your social media queue, blog draft, or product listing.
This process takes less than five minutes once you are familiar with the file. The reusable nature of the smart object means the setup cost is paid back every time you use it.
Long-Term Value and Versatility
A single mock up can serve many projects if you rotate your designs. Wedding calligraphy, vintage botanical illustrations, geometric patterns, motivational quotes, children’s drawings, brand logos, and abstract art all work on a plain white pillow. The neutral base makes it viable for both personal and commercial use across different style directions.
Because the file is digital and does not degrade over time, you can store it in your asset library and retrieve it years later. This is especially relevant for educators and publishers who produce recurring content and need consistent visual formats. The mock up becomes a reliable element in your production toolkit rather than a one-off asset.
One factor to keep in mind is software compatibility. Photoshop updates occasionally change how Smart Objects behave, but the basic workflow has been stable since CS4. If you switch to a different primary editor later, the transparent PNG gives you a fallback option that works in almost any image editor. This dual-file design extends the mock up’s usable life and reduces the risk of becoming locked into one platform.
Final Considerations for Smooth Integration
To integrate this mock up smoothly into your own work, start by reading the help file before you open the PSD. Understand which layers are visible and which are hidden by default. Then, test the workflow with a simple design first—a solid color or a basic shape—so you can verify that the mapping and perspective look correct before moving to complex artwork.
If you are using the PNG file with a transparent background, be mindful of layer order: your design should be the bottom layer, and the pillow image should be the top layer. This ensures the pillow surface appears over your artwork, creating the realistic printed effect.
Finally, remember that mock up images are presentation tools, not design tools. They showcase finished work. Use them when you need to communicate a vision, attract attention, or provide context for your audience. They complement your primary design process without replacing it.
The square pillow cushion mock up is a focused, practical asset for anyone who needs to present designs in a realistic, visually appealing format. With the right preparation and a clear understanding of where it fits in your workflow, it becomes a small but reliable component that improves the quality and efficiency of your visual content production.