Business Mock Up Visit Card Mockup: Streamlining Your Brand Presentation Workflow
When you need to present a business card design to a client, showcase it in an online portfolio, or preview a finished layout on social media, a realistic mockup makes the difference between a flat digital file and a compelling visual. The Bussines Mock Up Visit Card Mockup offers a straightforward, photography-based solution that places your design into a real-world scene without requiring complex 3D rendering or advanced Photoshop skills. This article walks through how this mockup fits into a practical design workflow, from preparation and file handling to final delivery across multiple platforms.
What the Mockup Is and Where It Fits in Your Process
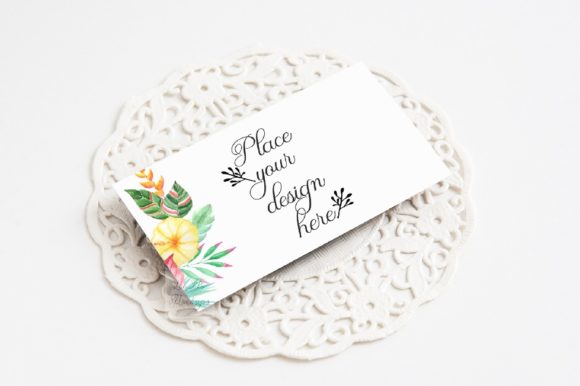
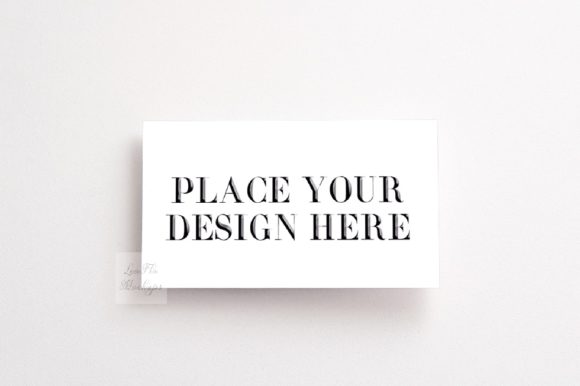
The Bussines Mock Up Visit Card Mockup is a high-resolution, neutral-toned top view flatlay photograph of a blank business card set against a clean background. The file arrives as both a JPG and a PSD with one smart object layer, so you can insert your design using Photoshop (CS4 or later) or a free online editor like PIXLR. Because the card and background are on the same layer and the objects cannot be moved, this is a fixed-scene mockup ideal for quick, consistent presentations rather than elaborate scene customization.
This tool fits naturally into several stages of a branding or design workflow. You might use it before a project launch to test color palettes and typography in a realistic setting. During a project, it serves as a mid-review visual for client approval. After completion, it becomes part of your portfolio assets, social media content, or product listing images. For entrepreneurs and small business owners designing their own cards, it offers a low-friction way to preview printed results before sending artwork to a printer.
Before You Begin: Preparation and File Familiarity
Getting the most out of this mockup starts before you open the PSD. Take a few minutes to understand what you are working with. The download includes one JPG at 3504 x 2336 pixels (300 dpi) and one PSD file with a single smart object layer set to multiply blending mode. A help file explains the layer structure and how to access the smart object. Because layers in the PSD are hidden by default, reading that help file first saves time and avoids confusion.
Prepare your card design at the standard 2 x 3.5 inch (or 5 x 9 cm) aspect ratio. Both modern and vintage style designs work well against the neutral monochromatic background. If your design uses a white background, the multiply blending mode will darken it slightly, so consider adding a slight brightness adjustment or testing with a transparent background in your design file. Having your artwork saved as a high-resolution PNG or PSD layer makes insertion seamless.
Integrating the Mockup Into Your Creative Process
The mockup interacts directly with your existing design tools and assets. You can place a finished card design from Adobe Illustrator, Canva, Affinity Designer, or even a simple image file. The smart object layer accepts any flat artwork, so you are not locked into a specific ecosystem. This flexibility matters when you work across multiple tools or collaborate with others who use different software.
Because the scene is a real photograph rather than a synthetic render, the lighting, shadows, and texture are already baked in. This gives your presentation an authentic, tactile feel that staged 3D mockups sometimes lack. The multiply blending mode on the smart object allows the underlying photo texture and shadows to show through your design, creating a natural printed-on-paper effect. For best results, avoid overly light or low-contrast designs that might wash out against the background.
Workflow Example: Client Presentation
Imagine you have just finished a business card design for a freelance client. Instead of sending a flat PDF, you open the PSD, double-click the smart object thumbnail, paste your design, save, and export a JPG. The resulting image shows the card resting on a textured surface with natural shadows. You add this image to a proposal document or project management board. The client sees exactly how the card will look in real life, reducing revision cycles and building confidence in your work.
Workflow Example: Portfolio and Social Media Content
For designers and creatives building an online presence, consistent presentation elevates your portfolio. You can use the same mockup across multiple card projects to maintain a uniform look. Because the background is neutral and unobtrusive, it works well on Instagram, Behance, Dribbble, or your personal website. The high resolution also allows cropping or resizing for different platform dimensions without losing quality.
Practical Implementation: From Design to Final Image
Using the Bussines Mock Up Visit Card Mockup involves a short sequence of steps that fit into any production pipeline. After downloading and unzipping the files, locate the PSD. Open it in Photoshop or upload it to PIXLR if you prefer a free, browser-based editor. The smart object layer is clearly labeled. Double-click its thumbnail to open a new window containing the placeholder design.
Paste or drag your card design into this placeholder window. Scale and position it to align with the card outline shown in the screen shot. Once satisfied, save the smart object window. The mockup main file updates automatically with your design in place. Export the final image as a JPG or PNG at full resolution for delivery.
A few practical observations improve results. Because the card and background share the same layer, you cannot reposition the card within the scene. Plan your composition so that your design fits comfortably within the card area. The multiply blending mode works best with designs that have strong contrast and solid elements. If your design has thin text or light colors, test a sample first to ensure legibility. You can adjust the overall image brightness or add a subtle curve adjustment after placing your design if needed.
Platform-Specific Applications and Content Creation
Different platforms call for different presentation styles. On a website portfolio, you might use the full-resolution image as a standalone showcase. On Instagram, crop the image to square or vertical format and add a brief caption about the design process. For Etsy or other marketplace listings, the mockup can serve as a product photo, showing potential buyers exactly what they will receive. Bloggers and educators can use the image in tutorials or articles about business card design, branding, or print preparation.
The neutral monochromatic palette also supports brand color overlays. If your brand uses a consistent color scheme, you can place the mockup image into a larger layout and add a colored border or text overlay. This keeps your visual identity coherent while showcasing the card design itself. Because the mockup is a real photo scene, it pairs well with other flatlay elements like notebooks, pens, or plants if you are creating a broader brand story.
Quality Control and Consistency Across Projects
Using the same mockup across multiple projects introduces a level of consistency that builds trust with your audience. Clients and followers begin to recognize your presentation style, which reinforces professionalism. However, consistency does not mean monotony. You can vary the card design, orientation, and surrounding context while keeping the core mockup constant. The high 300 dpi resolution ensures that even close-up crops remain sharp.
Quality control starts at the design stage. Check your card artwork for correct bleed, safe margins, and resolution before inserting it into the smart object. Because the mockup does not allow repositioning, any alignment errors will be visible in the final image. If you are producing multiple cards for the same client, create a template in your design software that matches the card dimensions exactly. This reduces guesswork and speeds up batch processing.
Managing Multiple Variations
If you need to present several design options to a client, you can duplicate the PSD file and place different designs into each copy. Alternatively, use the smart object workflow to swap designs quickly. Keep a folder of exported final images organized by client or project name. This simple file management habit pays off when you need to locate a specific presentation image months later.
Long-Term Usability and Asset Management
Digital products like this mockup have a long shelf life if handled properly. Store the original PSD and JPG files in a dedicated mockups folder within your digital asset library. The file format is compatible with Photoshop versions from CS4 onward, so you do not need to upgrade software to keep using it. Because it is a real photo scene, it will not become dated in the same way that trend-heavy 3D renders might. The neutral aesthetic remains relevant across years of design work.
Consider how this mockup fits into a broader toolkit. You might combine it with other flatlay scenes, stationery mockups, or device frames to create a complete brand presentation suite. The single smart object layer means you can automate placement using Photoshop actions if you produce many cards regularly. For occasional use, the manual process takes only a few minutes per design.
If you ever need to share the mockup with a colleague or client who does not have Photoshop, the free PIXLR editor provides a viable alternative. This reduces friction in collaborative workflows where not everyone has access to paid software. Always direct collaborators to the help file included in the download to avoid confusion about hidden layers and the multiply blending mode.
Final Observations on Workflow Integration
The Bussines Mock Up Visit Card Mockup serves a specific purpose: turning a flat design into a realistic, presentation-ready image with minimal effort. It does not replace a full mockup generator or a 3D rendering tool, but it does not need to. Its strength lies in simplicity, speed, and authenticity. For professionals who need to produce consistent, high-quality card presentations without spending hours on scene setup, it is a practical addition to the workflow.
Whether you are a freelancer preparing a client proposal, a small business owner previewing your own cards, or a blogger creating content around design processes, this mockup reduces the gap between digital artwork and real-world perception. By understanding its file structure, preparing your designs properly, and integrating it into your routine, you gain a reliable tool that keeps your presentations polished and professional.